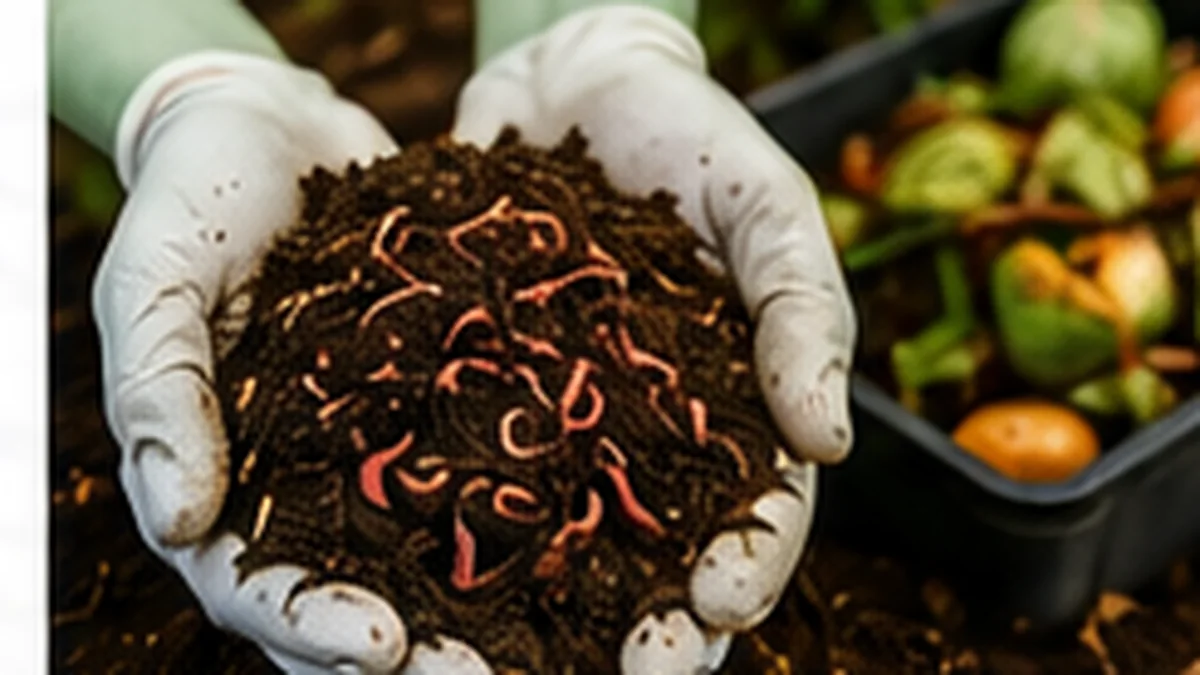
Key Takeaways
- Managing your worm habitat
- Solving frequent problems
- Collecting worm byproducts
- Applying vermicompost in your garden
Maintaining Your Worm Bin
Caring for your worm bin can be a delightful and fulfilling journey! Picture this: crafting the perfect haven for those hardworking little compost creators. Temperature is crucial—aim to keep it snug between 55°F and 77°F, where they thrive best. And don't overlook moisture; it should feel like that ideal damp sponge, not sopping wet! Too much water can spell disaster, drowning your squiggly friends, while too little can leave them parched and gasping. If you spot signs of dryness creeping in, just sprinkle in a bit of water slowly until you hit that golden balance.
Now let’s talk grub—the culinary delights you serve up for your worms! They adore kitchen scraps galore, but beware—some foods are total no-gos. Citrus peels? Spicy dishes? Absolutely off the menu as they'll wreak havoc on their delicate digestive systems! Strive for harmony with a diet rich in greens and browns; think vegetable remnants, coffee grounds galore, and even shredded paper to boot. Rotate their feasting zones regularly to enhance aeration and stave off any unwelcome odors. By keeping an eye on these wrigglers through regular check-ins, you'll ensure they remain blissful and thriving—producing that luscious vermicompost you're itching to dig into for your garden endeavors!
Tips for Optimal Conditions
To keep your worm bin in pristine condition, you must first tune in to the temperature. These little wrigglers absolutely flourish within a cozy range of 55 to 77 degrees Fahrenheit. Exceed that upper limit, and they may just succumb to stress—perhaps even death! Conversely, dip too low on the thermometer’s scale, and their busy bodies will slow down like molasses in winter, rendering them ineffective at processing waste. It’s wise to tuck your bin away in a shady nook or an unheated garage during those blisteringly hot summer months.
But wait—there's more! The moisture levels are equally vital for maintaining happy worms. Picture this: bedding that feels like a damp sponge—not saturated with water but certainly not parched either. Too much moisture? You risk creating an odoriferous disaster! Not enough? Your worms might find themselves desiccated and distressed. Fear not; when things feel a tad dry, simply sprinkle some water onto the bedding or toss in some shredded newspaper if it leans towards soggy territory. Regular checks are key—they’ll help ensure everything is just right for your beloved composting companions!
Troubleshooting Common Issues
Worm bins, those little ecosystems of composting magic, can occasionally hit a few snags on their journey to recycling perfection. One pesky problem that often crops up is the dreaded odor—an unwelcome smell wafting from your bin could signal an imbalance in the delicate dance between food and moisture. If you catch a whiff of something foul, it’s usually a sign that you've overfed your squiggly pals or let things get too soggy. To restore harmony, simply cut back on the grub and toss in some dry bedding—think shredded newspaper or cardboard—to soak up excess moisture. And don’t forget about aeration! Just like humans crave fresh air, worms need oxygen to thrive.
Then there's the issue of escape artists—those slippery worms attempting daring jailbreaks from their cozy confines. This behavior might suggest that conditions inside their home are less than ideal. A quick temperature check along with monitoring moisture levels can work wonders in turning this situation around. If it's too damp or parched for comfort, your wriggling companions might be plotting an exodus! Make the necessary adjustments, and before long, those little critters will settle back down into blissful contentment right where they belong!
Identifying and Solving Problems
Every once in a while, you might catch sight of your worm bin looking less than stellar. The telltale signs of distress can be quite alarming—think foul odors wafting through the air, an overabundance of moisture pooling at the bottom, or even a noticeable decline in your wriggly residents. If that unpleasant smell is invading your space, it’s likely a sign that things are too soggy or perhaps overwhelmed with food that's turned nasty. Striking the right balance between wet and dry materials is crucial here; don’t forget to ease up on feeding! If dryness seems to be the culprit, give everything a gentle misting or toss in some more kitchen scraps loaded with moisture.
And then there’s the nuisance of those irritating fruit flies—or worse—other unwelcome critters taking residence within your wormy haven. To combat this invasion, simply blanket your food scraps with a cozy layer of shredded newspaper or dry leaves. This clever move not only deters pests but also injects some extra carbon into the mix for good measure! Keep an eye on moisture levels and ensure proper aeration so that your worms remain content and thriving while you keep those pesky intruders at bay.
Harvesting Worm Castings
When you catch sight of your worm bin brimming with that luscious, dark treasure, it’s high time to think about harvesting those precious worm castings. These nutrient-dense nuggets are primed for collection after the worms have thoroughly indulged in their buffet of kitchen scraps and other organic delights. And guess what? The process of gathering this compost is surprisingly straightforward!
Begin by shifting the contents to one side of the bin—this clever maneuver gives the wriggly inhabitants a chance to skedaddle away from your workspace, making your extraction much tidier.
To truly maximize your haul of worm castings, consider employing a few nifty techniques. One popular method involves using a screen or sieve to sift through that rich compost. This allows you to separate out any lingering worms and those stubborn chunks of food still clinging on for dear life. Another ingenious tactic? Create a “worm chow” pile with fresh scraps over on the opposite side! This culinary invitation tempts the worms to migrate toward it, leaving behind those golden castings just waiting for you. But remember—patience is paramount here. Once you've gathered these little gems, you'll possess an exceptional organic fertilizer that will make your plants sing with joy!
Methods for Collecting Your Compost
Once your little wrigglers have had their moment to conjure up some black gold, it’s time to gather the glorious compost they’ve crafted. The easiest route? Enter the illustrious "migration technique." Picture this: you gently nudge all of your worms over to one side of the bin, leaving the other half blissfully empty for a day or two. Like clockwork, those hungry critters will naturally skedaddle toward the fresh bounty, allowing you to scoop out that finished vermicompost from the now-empty side. It’s a nifty trick—no more wrestling with worms while trying to sift through!
And then there’s another crowd-favorite method: sifting! All you need is a trusty screening device at your disposal. Just grab a handful or two of that dark treasure and give it a good shake through a screen or mesh. Watch as those smaller particles tumble down like grains of sand while any lingering worms and larger debris remain behind—ready for their return trip back into the bin for yet another round of composting magic. Both techniques are straightforward and lead straight to that nutrient-rich vermicompost—a perfect gift for your garden's eager roots!
| Method | Description | Pros | Cons |
|---|---|---|---|
| Migration Technique | Gently move worms to one side of the bin, leaving the other half empty to collect compost. | Simple, minimal disruption to worms, effective collection. | Requires patience, may take a couple of days. |
| Sifting | Use a screen or mesh to shake out finished compost while keeping worms and debris behind. | Quick, effective for separating compost, easy to do. | Can be labor-intensive, may need special equipment. |
| Layering | Add new kitchen scraps to one side while letting the other side finish composting. | Continuously adds fresh material, promotes worm migration. | May require careful monitoring to avoid overloading. |
| Hand-Collection | Manually remove finished compost with gloves, separating worms by hand. | Complete control over what gets collected, thorough. | Time-consuming and can be messy. |
Using Vermicompost in Your Garden
Unleashing vermicompost in your garden can truly work wonders for your plants. This remarkable organic fertilizer, teeming with nutrients, acts like a magic elixir that supercharges overall plant vitality. When you incorporate it into your soil, it not only improves texture but also amplifies moisture retention—like serving up an irresistible feast for your greenery! You may witness a delightful surge in growth and flowering, making vermicompost a beloved choice among gardeners yearning for natural remedies.
Diving into the world of vermicomposting is surprisingly simple. Just sprinkle it directly into planting holes or blend it into potting mixes for container gardens; it's as easy as pie! If you're nurturing vegetables or herbs, integrating some around their roots can be revolutionary—a true game changer. Keep a watchful eye on those plants after applying this nutrient-dense treasure; they’re bound to express their gratitude as they thrive under the benefits of vermicompost!
How to Apply this Organic Fertilizer
Incorporating vermicompost into your garden? Oh, it's nothing short of revolutionary! Picture this: you start by blending it seamlessly with your existing soil—a nutrient explosion waiting to happen! A handy guideline suggests aiming for about one-quarter to one-third of that luscious vermicompost mixed in with the total soil volume, but hey, let your plants guide you; they know best what they crave.
Nestle that earthy goodness around your plants to supercharge their growth and boost moisture retention like a pro. But wait—there's more! Take those rich worm castings and sprinkle them right on top as a delightful dressing. It’s incredibly simple—and each time you water, those nutrients will trickle down into the soil below. Don’t hold back; let your plants bask in all that nutritious glory—they’ll drink it up and flourish before your very eyes! Whether you're nurturing vibrant veggies or cheerful blooms, showering them with a little worm love can truly work wonders.
- Make sure to choose high-quality vermicompost for the best results.
- Mix the fertilizer into the soil well for even distribution.
- Water your plants after applying vermicompost to help nutrients absorb.
- Apply vermicompost every 4-6 weeks during the growing season.
- Monitor your plants' growth and adjust the amount of fertilizer as needed.
- Experiment with different plants to see who loves it the most!
- Don't forget to store any unused vermicompost in a cool, dry place to maintain its quality.
Conclusion
Crafting and nurturing a worm bin can be an exhilarating journey, brimming with a plethora of benefits for your gardening escapades! Regularly peeking into the cozy confines of your bin is crucial—it keeps those wriggly workers thriving and industrious, transforming everyday kitchen scraps into luscious, nutrient-packed vermicompost. And let’s not overlook that profound sense of accomplishment that comes from effectively repurposing waste while simultaneously enriching your garden soil—it's nothing short of gratifying!
Dare to tinker with various techniques when it’s time to gather those precious worm castings! Whether you lean toward the tray method or prefer a more tactile approach, you'll quickly realize there isn't merely one right way to do it. Embracing this earthy organic treasure in your gardening routine can pave the way for robust plants and abundant harvests. Here’s to joyful worm composting adventures ahead!
FAQs
What on earth is vermicomposting?
Ah, vermicomposting—it's that fascinating alchemy of wriggling worms, usually the charming red wigglers, transforming your kitchen scraps and organic detritus into a treasure trove of nutrient-rich compost known affectionately as worm castings.
So, how do I embark on this worm bin adventure?
Setting up a worm bin is like crafting a cozy little haven for those industrious critters! You’ll need a container boasting air holes (think ventilation!), some fluffy bedding material—shredded newspaper or coconut coir works wonders—and of course, your trusty red wigglers. Layer in the bedding with tender care, sprinkle in some soil goodness, then welcome the worms and toss in those food scraps!
What culinary delights should I serve my worms?
Worms are quite the connoisseurs—they relish fruit and veggie remnants, adore coffee grounds, and even appreciate crushed eggshells! But hold your horses; steer clear of meat, dairy products, and greasy fare to keep that bin fresh-smelling and thriving.
How can I tell if my worm paradise is thriving?
A vibrant worm bin radiates health—it should feel pleasantly moist to the touch with an earthy aroma wafting through the air while active little wrigglers go about their business. But beware; if you spot pesky fruit flies buzzing around or catch an unpleasant whiff drifting up from below—uh-oh! Time for some troubleshooting!
How do I gather my precious worm castings?
Collecting those glorious vermicompost gems involves a clever little trick! Shift everything over to one side of your bin—a simple migration exercise for your squirmy friends. Add fresh bedding and delectable treats to the other side. With time (and patience), watch as they migrate across allowing you to scoop out that finished compost from their former stomping ground!
